How to Restring Pearls: A Step-by-Step Guide to Restoring Beauty and Elegance


Pearls do more than look pretty. They carry memories, mark milestones, and can become family heirlooms. Whether you have your grandmother's pearl necklace or wear a favorite string (or several) for special occasions, these lustrous gems are not just run-of-the-mill jewels. They have emotional significance.
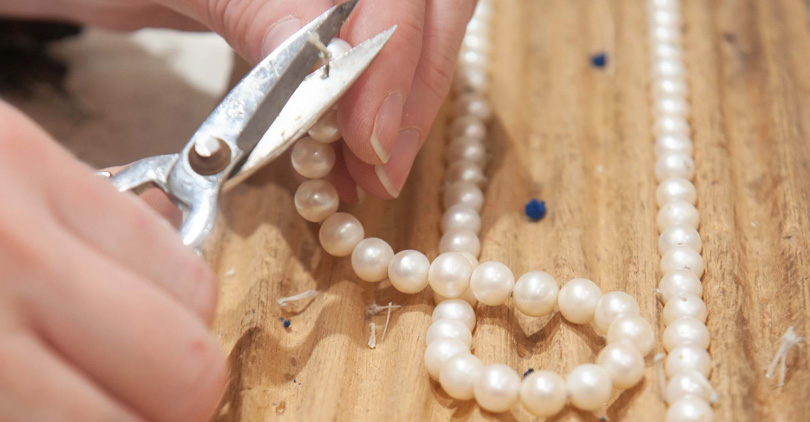
But there's a catch. Silk thread is commonly used to knot pearls on, and over time, it can stretch or fray. They can put your precious beads at risk of loss or damage.
This is where restringing comes in. Of course, it's practical – but it's also a form of TLC for your jewellery. It's satisfying to learn how to do something that feels both rewarding and old-school.
Armed with patience and the right tools, you can give a new lease of life to your necklace and make sure it stays looking beautiful for longer. If you've never tried this before, don't worry. Our guide will take you through every step: knot by knot.
Why Restring Pearls?
Do you need to restring your pearls? Yes, especially if they are a favorite pair. Here's why:
- Prevent damage: Pearls are soft, and friction can wear away their nacre coating. Knotting between each pearl when restringing stops them rubbing together, so keeps them looking good longer.
- Avoid loss: Ever had a necklace break and beads fly everywhere? Knotting the string well means this is less likely to happen.
- Keep shape: As strings age, they stretch and sag. Re-threading will give them a new lease of life. And make sure yours sits attractively around your neck!
Pro Tip: If your pearls are worn frequently, they should be restrung every 1 to 2 years. Don't forget to have a check-up done now and then, if they just sit in a jewelry box.
Tools and Materials Needed
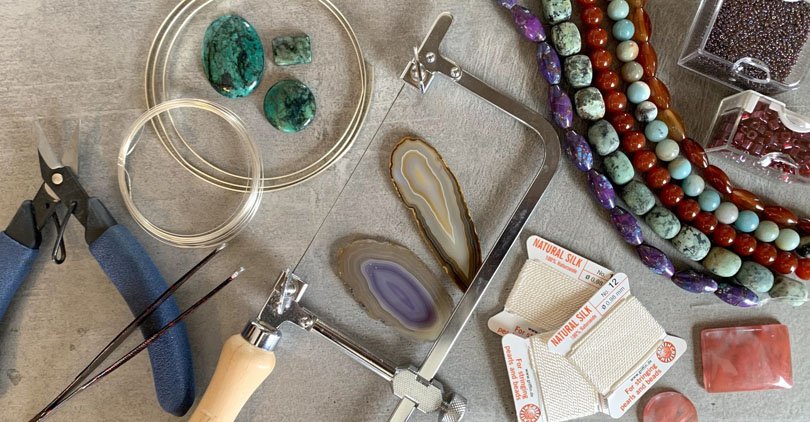
Before you dive in, gather everything you need for a smooth restringing session:
- Pearls (loose or still on their old thread)
- Clasp (reuse the original or choose a new one that fits your style)
- Silk or synthetic thread (silk is traditional, synthetic is durable—match the size to your pearl holes)
- Beading needle or pre-threaded carded silk
- Knotting tool, tweezers, or awl (for tight, neat knots)
- Scissors, super glue, lighter (if using synthetic thread)
- Toothpick
- Tray or towel-lined work surface (pearls love to roll!)
- Foam or felt mat (helps keep your pearls organized)
Thread Talk:
Silk drapes beautifully and has an elegant look, but it may stretch with age. Synthetics have more strength. For a lasting finish, flame the ends if necessary.
Preparing for the Process
Before starting, make sure your hands are clean and free of lotion, oils, or snacks; pearls are slippery. Spread out a towel or piece of felt so that if they do get away, you'll be able to catch them.
If your strand is graduated (with beads that go from big to small), pay attention! It's important not to mix them up as you take the piece apart. Either slide the beads onto a tray in order or use a temporary thread (or fishing line) to keep everything in place.
Measuring Your Thread
Cut a piece of thread three times the length of your necklace. This will allow enough for both knotting and adding the clasp.
Step-by-Step: How to Restring Pearls
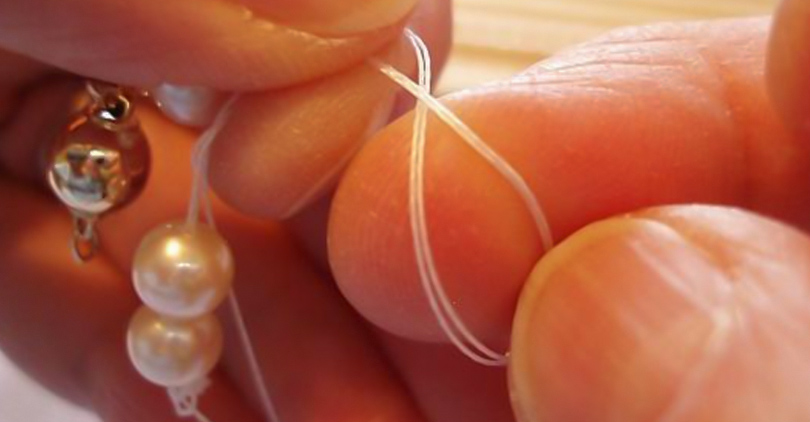
1. Attach One Side of the Clasp
Begin by fastening the thread firmly to one side of your clasp. For increased durability, consider using a double or surgeon's knot.
If working with silk, apply a small amount of glue onto the knot using a toothpick. This serves as an extra security measure. Allow the glue to dry fully before continuing.
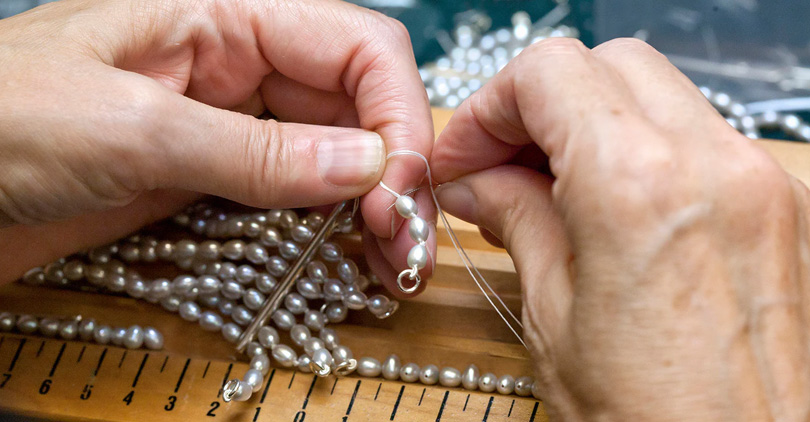
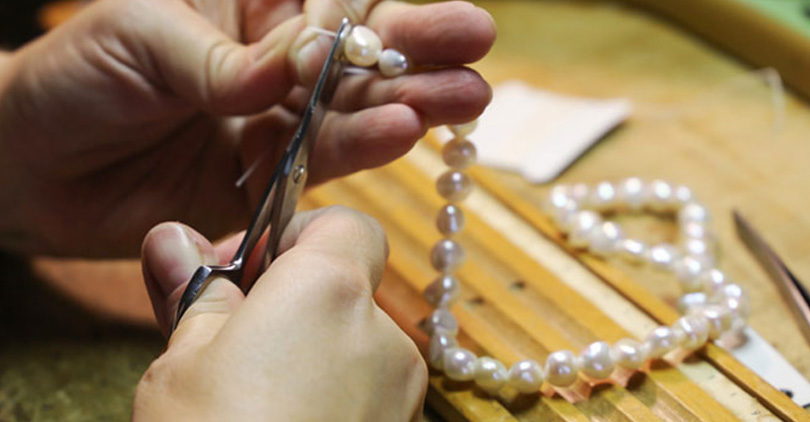
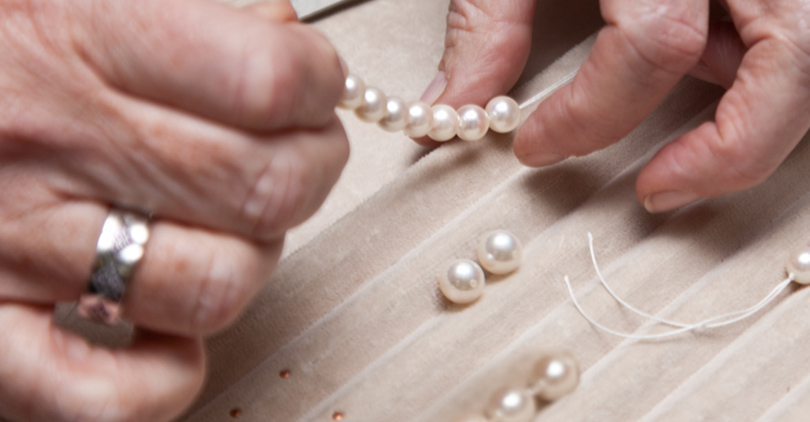
2. Begin Stringing Pearls
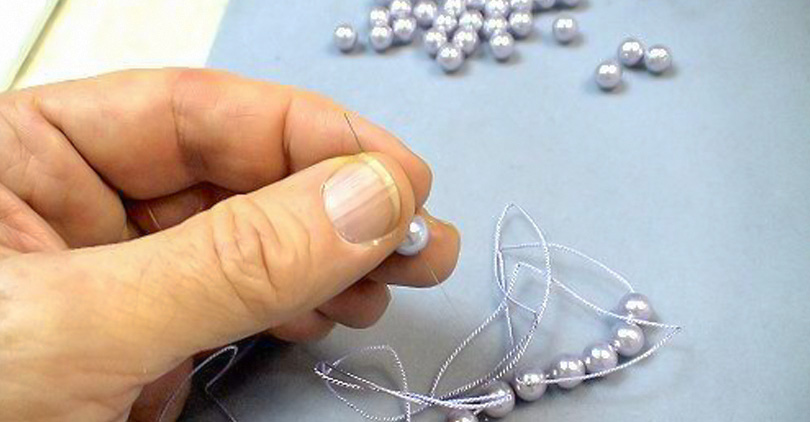
Put on the initial pearl bead. Make a secure knot right next, so there's little space between the two. You'll want to have your tweezers or beading awl handy for this next step. Use them to help push the knot snug against the pearl.
Continue beading: pearl, knot, pearl, knot. It might feel awkward at first, as though your hands are all thumbs. But after you've strung a few beads, you'll hit your stride. The main thing is to keep those knots tight and evenly spaced.
3. Continue Knotting
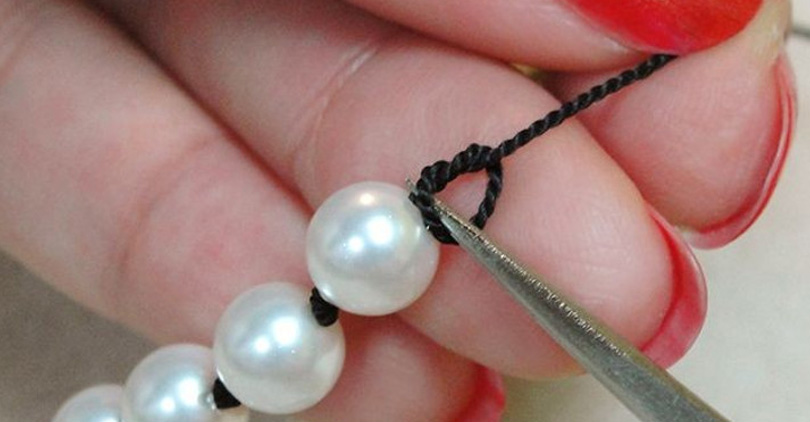
Avoid rushing. If necessary, take breaks and periodically check to ensure the strand is uniform as you progress with your task. Should a mistake be made during the knotting process, stay calm. Simply retrace your steps and attempt it once more.
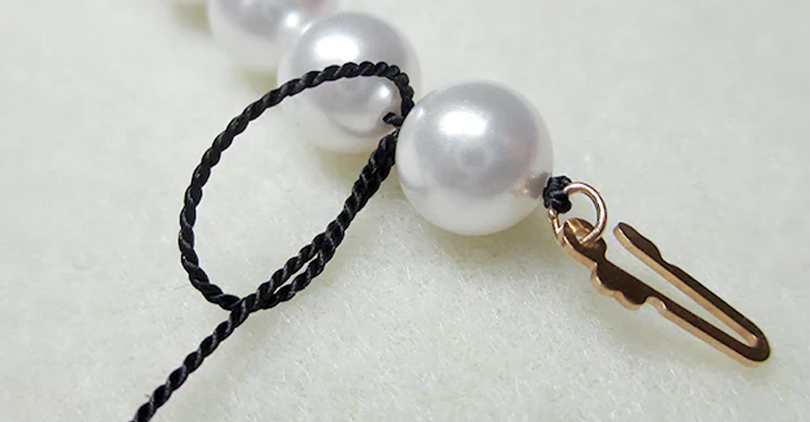
Finishing the Strand
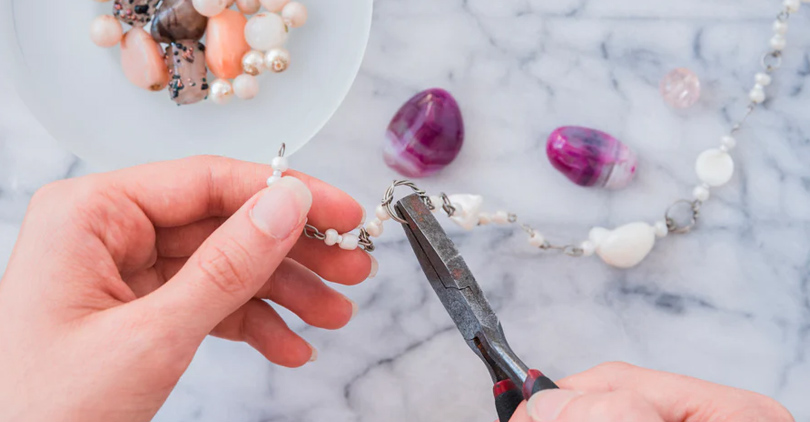
Once your final pearl is set, you can now set the other half of the clasp.
4. Attach the clasp
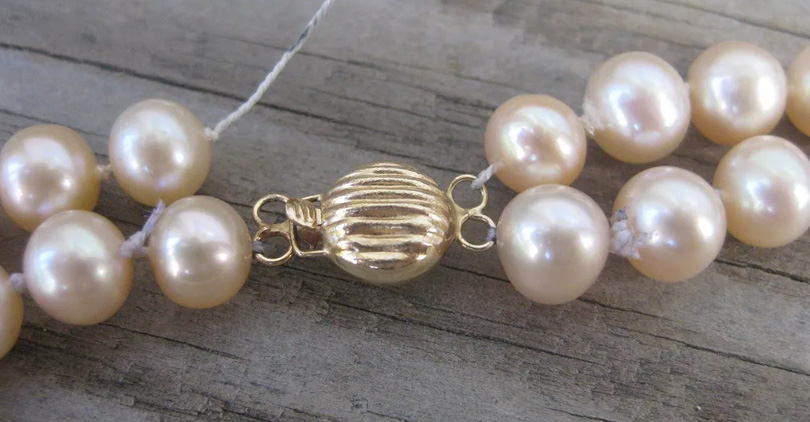
Slide the thread's end through the clasp's loop and secure it with a double knot.
5. Sealing the Deal
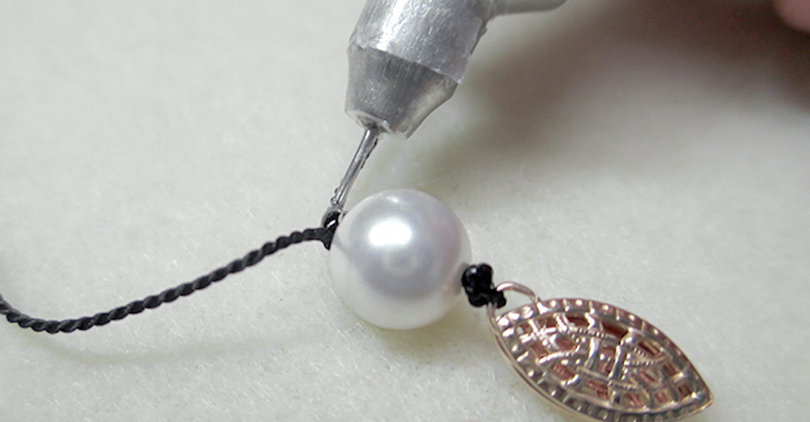
- For silk thread: Apply a small amount of super glue to the last knot.
- For synthetic thread: Use a lighter and gently melt and seal the end (be cautious—don't burn your pearls!).
Cut off the excess thread near the knot, but not too close. Give the strand one final inspection: Are the knots secure? No sag? Beautiful.
Caring for Restrung Pearls

Congratulations! You have successfully secured your pearls, making them shiny and ready for wearing. But if you want to ensure they remain looking great, there are some golden rules of pearl care you need to follow:
- Clean them after wearing: Use a soft cloth to gently wipe each pearl. This will remove any body oils, sweat, or perfume that could otherwise cause damage over time.
- Store them flat and soft: To avoid stretching the thread over time, lay your pearls down flat – either in a jewellery box lined with fabric or in a soft pouch.
- Keep them away from chemicals: Pearls don't like cleaning products, hairspray, or perfume. They are, however, fans of natural skin oils.
- Check knots and thread regularly: Does your thread look fuzzy? Do you see tiny gaps between the knots? Yes, it's probably time for restringing. A good rule of thumb is to get this done once a year if you wear the pearls often.
Conclusion
Pearl restringing is more than a routine task—it's an opportunity to reconnect with the heritage and loveliness of your piece. A strand you received as an inheritance, a gift, or simply one you gave yourself, maintaining your pearls is a sign of reverence for their enduring sophistication.
Even as a beginner, you can definitely master this art. It may not be a perfect first strand, but that's alright! All knots are part of the learning curve, and every restringing job increases your confidence and accuracy.
In the end, you aren't just fixing jewelry. You are preserving history, showing respect for expert craftsmanship, and reviving the shine that can last for many years. Grab your supplies, put on some music, and start stringing those pearls – because both they and you are worth it.
Leave a Comment